The Art of Drawing a Ninja – A Step-by-Step Guide
In feudal Japan, the ninja, also known as shinobi, was a covert agent and mercenary who excelled in the art of ninjutsu. These highly skilled individuals were hired as spies, raiders, arsonists, assassins, and even terrorists. Despite their historical context, the fascination with ninjas remains unwavering, captivating people of all ages. Ninjas have also become popular figures in movies and shows, with notable examples being Naruto and Ninja Turtles.
The popularity of ninjas has created a significant demand for a free ninja drawing tutorial. If you’ve ever wanted to learn how to draw a ninja, you’re in luck! We have created a detailed step-by-step process that will guide you through the process, making it easier to bring your ninja to life on paper.
Step 1: Drawing the Ninja’s Head
To begin, start by drawing a square shape with rounded edges on the upper portion of your paper. This shape will form the entirety of the ninja’s head. By starting at the top, you ensure that you have enough space to draw the entire body of the ninja.

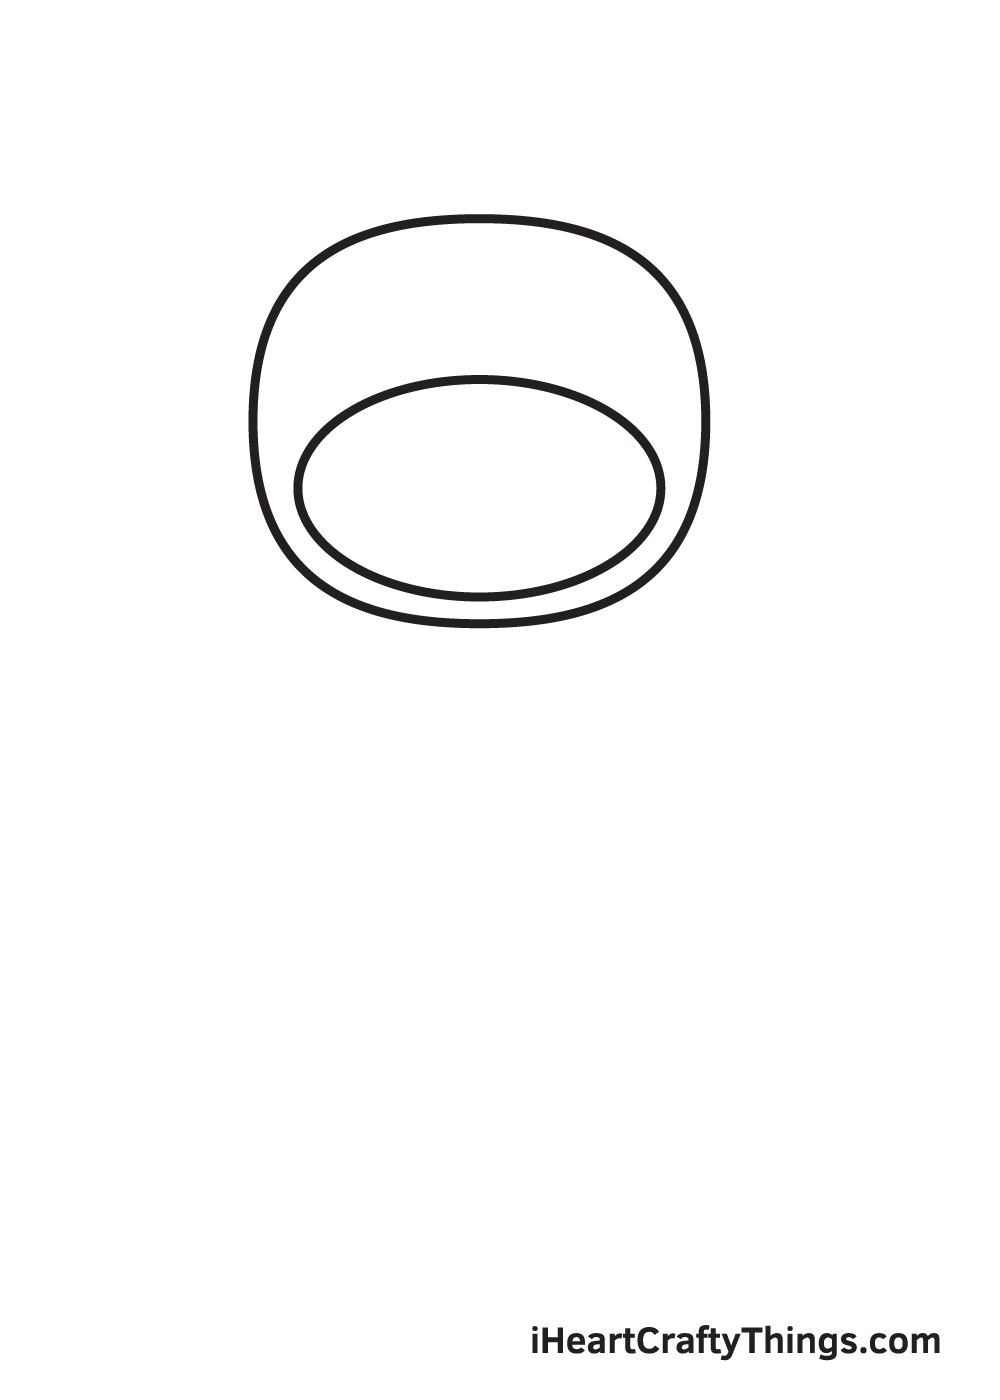
Step 2: Creating an Outline of the Ninja’s Head
Within the square shape you drew in the previous step, draw a sideways oval shape. This oval outlines the hem of the ninja’s hood, creating a division between the head and the face of the ninja.
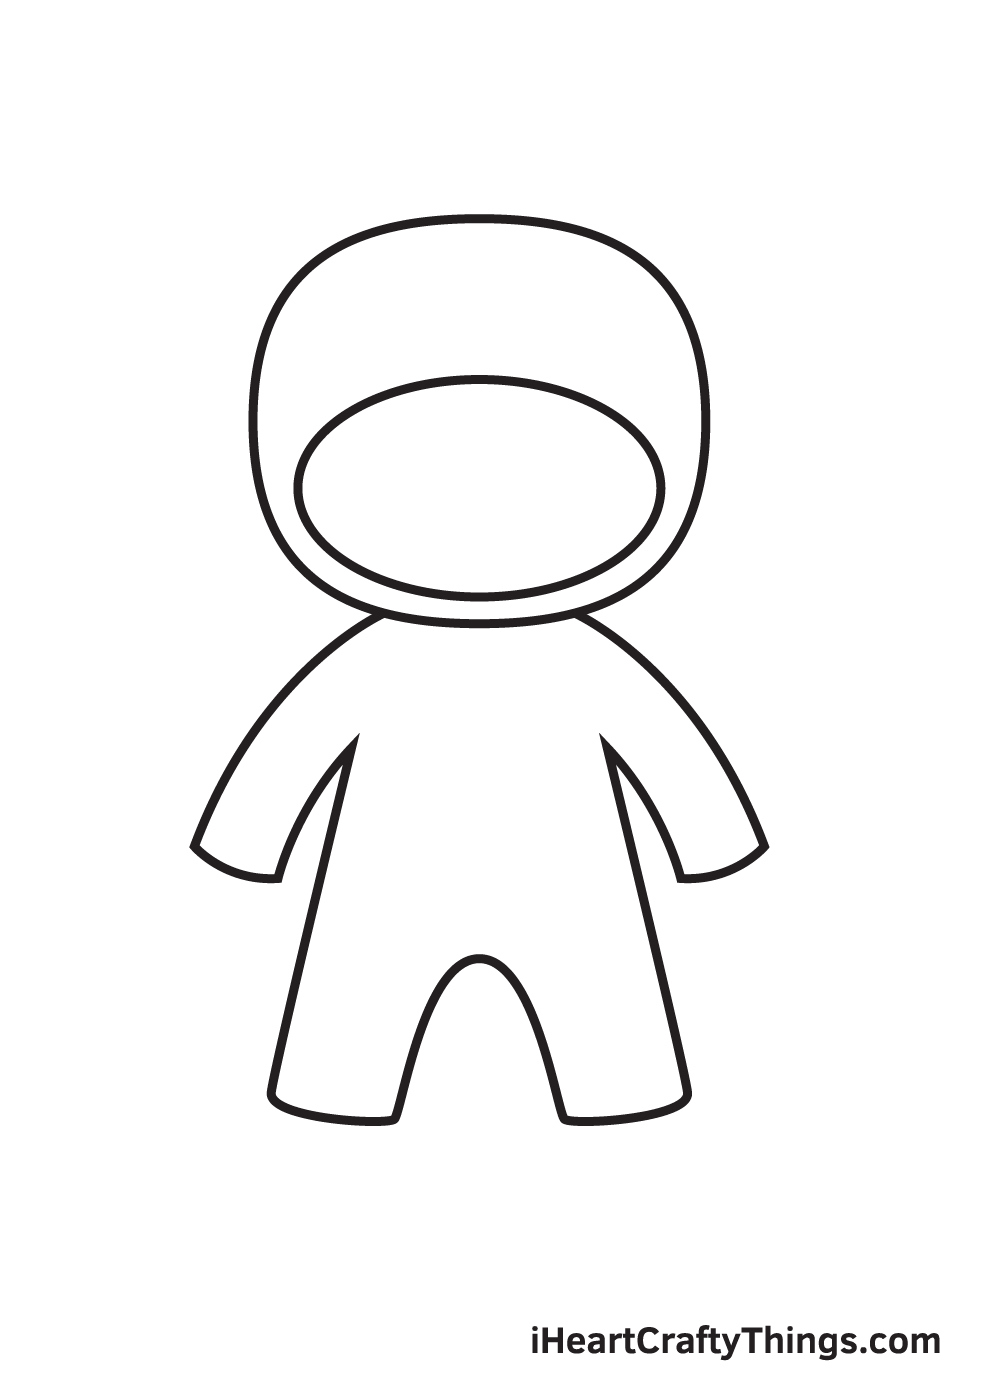
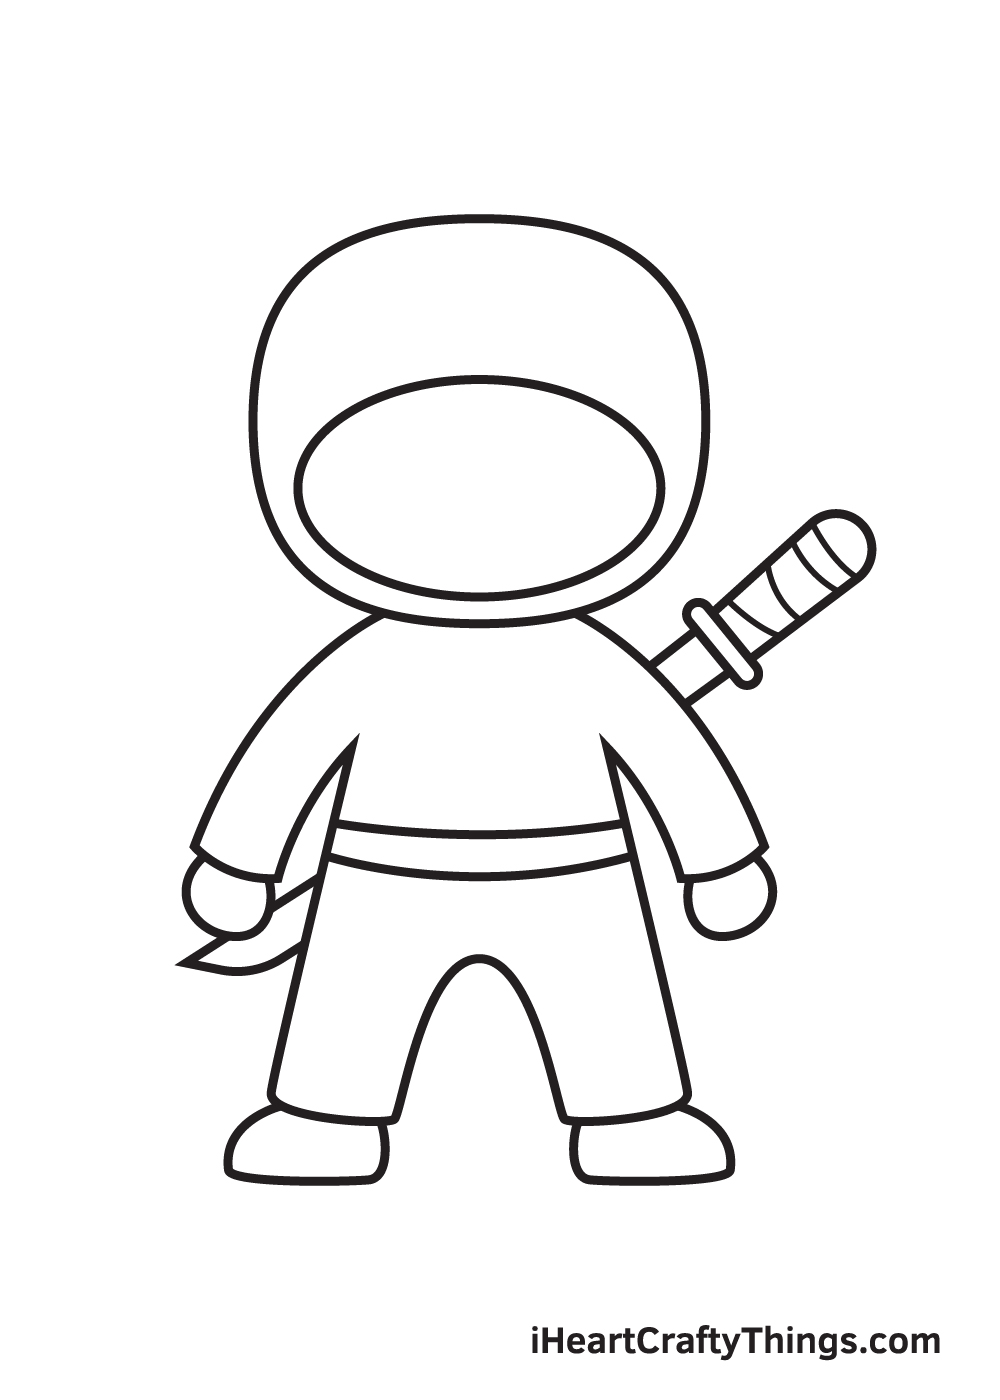
Step 3: Drawing the Body of the Ninja
Next, it’s time to draw the body of the ninja. Start by drawing an elongated figure to represent the arms, and another elongated figure to structure the legs. Then, draw a mirrored figure on the opposite side to complete the ninja’s body. Ensure that both arms and legs are symmetrical, as this shape outlines the long-sleeved shirt and trousers worn by the ninja.
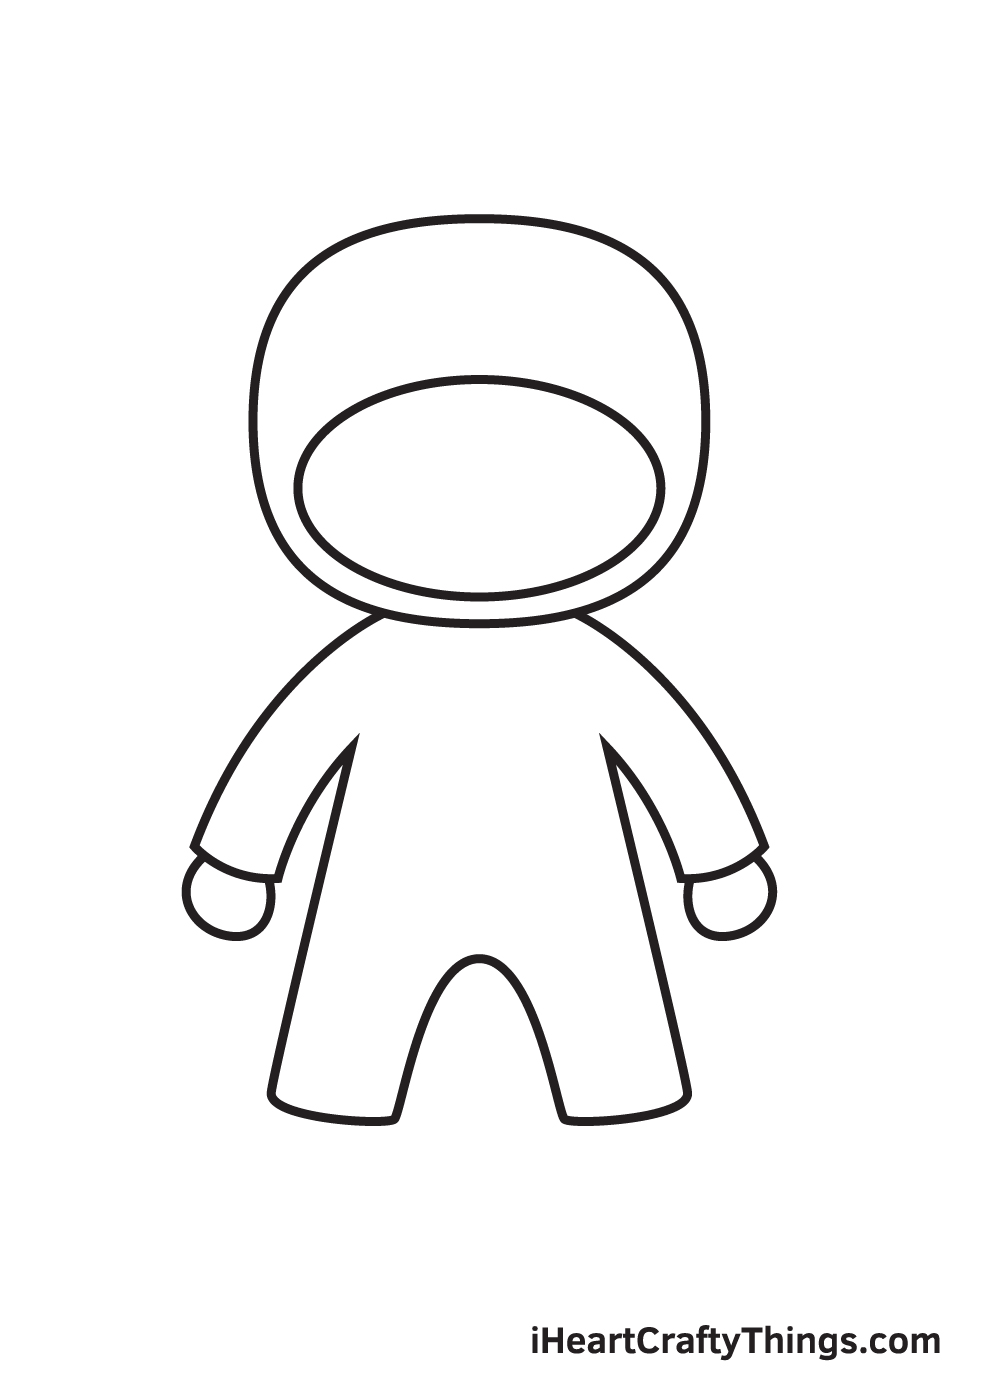
Step 4: Drawing the Ninja’s Hands
Now, let’s draw the ninja’s hands. At the bottom of each arm, draw a circular shape to represent the hands. It’s important to ensure that both hands are of the same size and proportion.
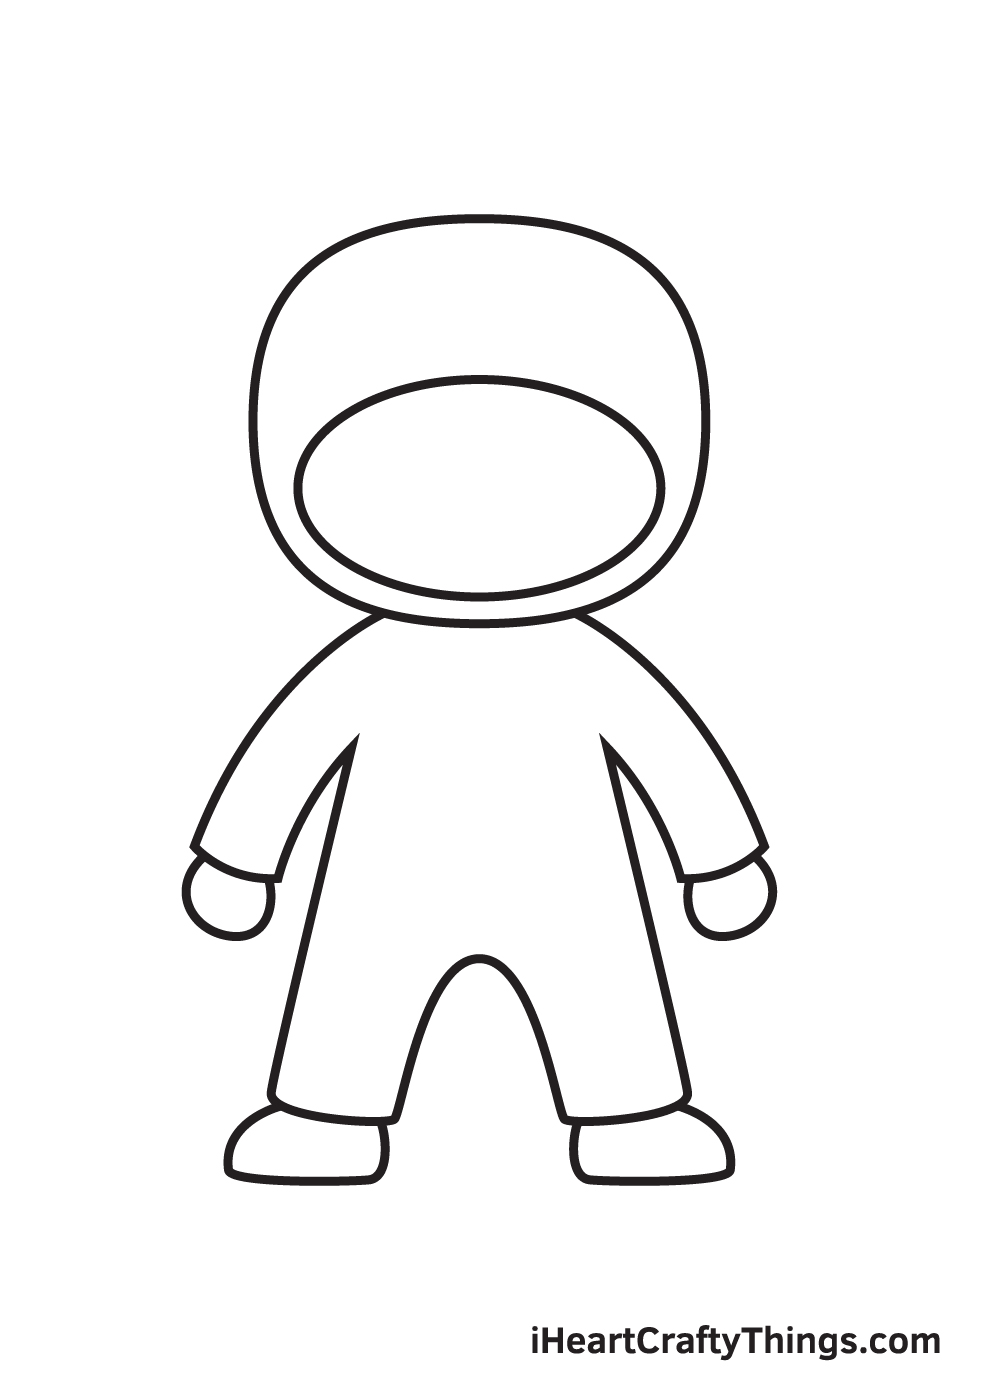
Step 5: Creating the Ninja’s Shoes
The next step is to draw the ninja’s shoes. Draw two curved lines with a horizontal line at the bottom beneath each leg. This will create the pair of shoes that the ninja is wearing. Take note that the ninja’s feet should be facing opposite directions, as depicted in the illustration.
Step 6: Adding a Belt on the Ninja’s Clothing
Now, it’s time to draw a belt on the ninja’s clothing. Draw a parallel horizontal line on the abdomen part of the ninja’s body. This line represents the belt, completing the traditional outfit of a ninja.

Step 7: Drawing the Sword on the Ninja’s Back
A ninja is never without their trusty sword. In this step, we’ll draw the sword. Start by drawing the handle of the sword, then connect it with a sharp-edged blade. Don’t forget to add patterns on the handle to give it an authentic look.
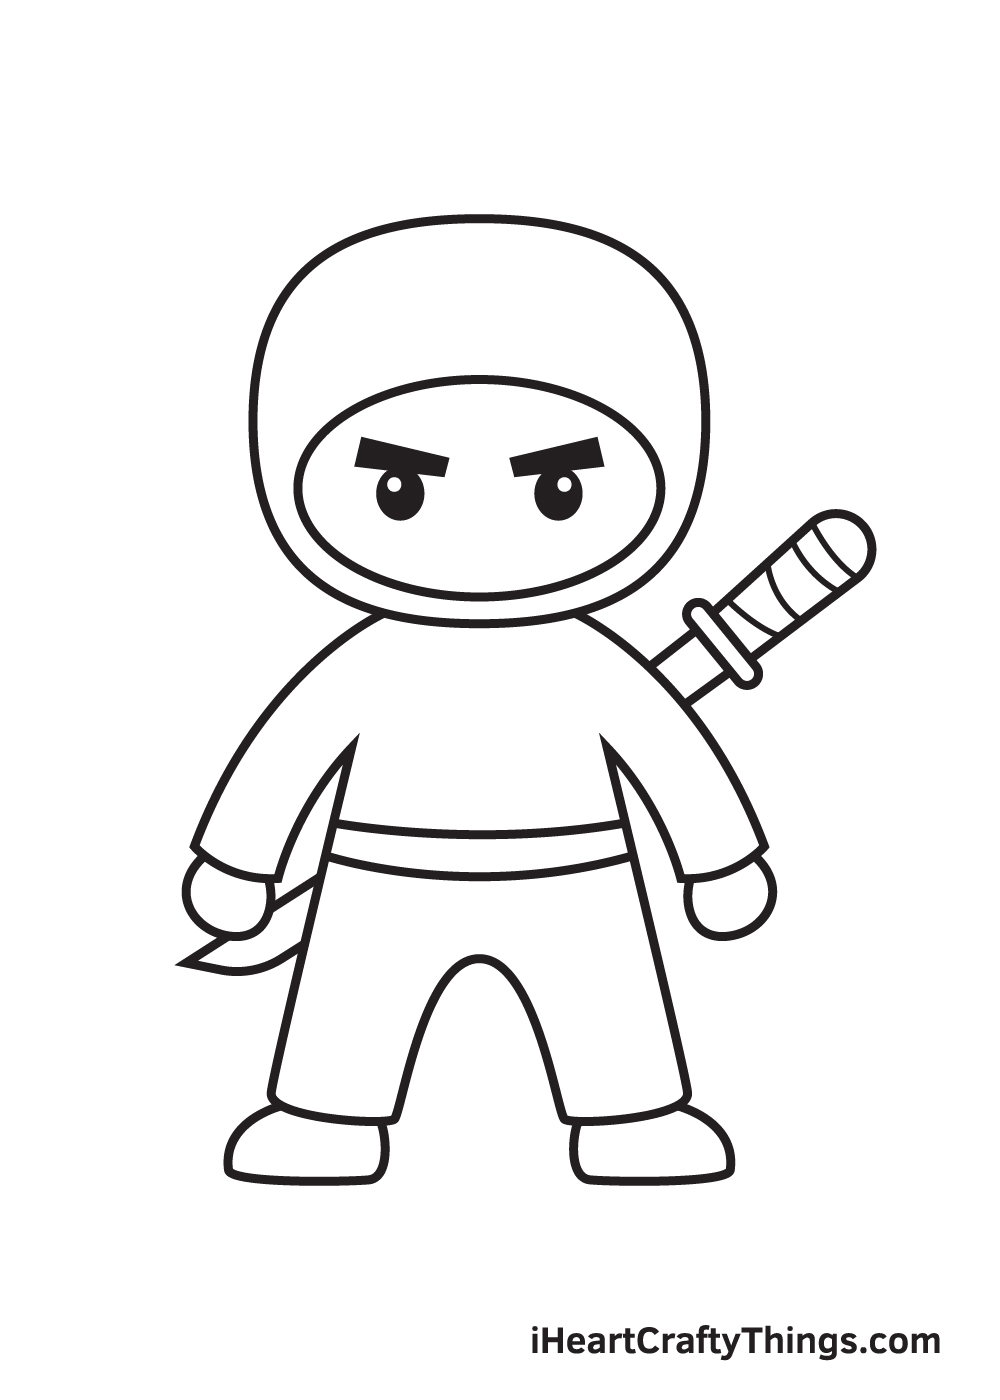
Step 8: Adding the Ninja’s Eyebrows
Now, let’s focus on the ninja’s face. Draw two sideways rectangular shapes below the ninja’s forehead to outline the eyebrows. To make them look thicker and fuller, add shading to both eyebrows. Remember, men’s eyebrows are typically thicker and more defined than women’s eyebrows.

Step 9: Drawing the Ninja’s Eyes
To complete the ninja’s face, draw a pair of eyes. Start by drawing two circle shapes underneath each eyebrow. Then, draw a tiny circle inside each eye to represent the pupil. Add shading to the eyes, leaving the tiny circle unshaded to create a dramatic “gleaming eyes” effect.
Congratulations! You have successfully drawn a ninja using our step-by-step guide. Now, it’s time to add some color and bring your ninja to life.
Adding Color to Your Ninja Drawing
The traditional ninja costume, also known as ninja-yoroi or ninja armor, typically consists of all-black clothing, including a jacket, trousers, shoes, and a hooded cowl. You can choose to follow this standard color scheme or get creative with your own unique set of colors. Feel free to customize your artwork and showcase your artistic skills.
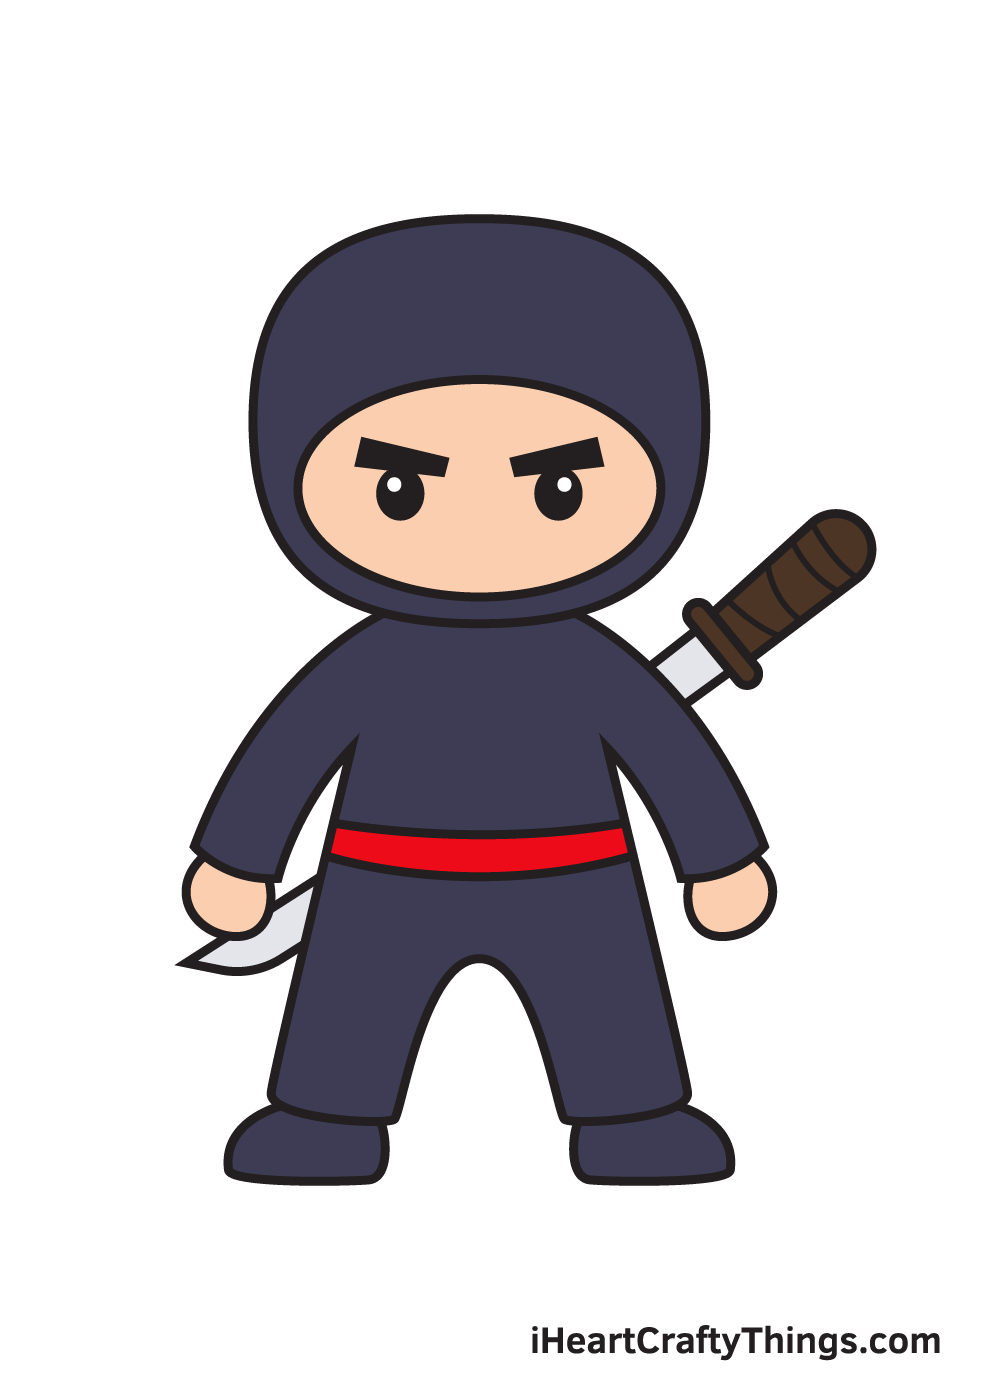
As you can see in the illustrated example, we followed the traditional color scheme for our ninja drawing. However, you can experiment with different color combinations to make your ninja truly unique.
Now that you have mastered the art of drawing a ninja, why not take it a step further and make your drawing even more impressive?
Enhancing Your Ninja Drawing
Ninjas are versatile and can operate in various environments. You can showcase this versatility in your ninja sketch by incorporating different environmental conditions. For example, if you want your ninja to operate in snowy environments, you can create a camouflage pattern using light gray and blue spots for the outfit. Alternatively, you could go for a green color scheme to transform your ninja into a jungle ninja.
Furthermore, ninjas often work in teams. To make your ninja drawing more dynamic and exciting, consider adding some ninja buddies. Drawing additional ninjas should be relatively easy since you can closely match their appearance to the first ninja you drew, making only minor adjustments.
Now that you have learned how to draw a ninja, it’s time to unleash your creativity and have fun with colors. Watch as your ninja ultimately comes to life on paper!